|
SCROLL DOWN FOR STORYBOARD TEMPLATES
WHY STORYBOARD AT ALL?
Storyboards are the visual equivalent of a script / screenplay, giving visual form to ideas and thoughts, helping the filmmaker translate their ideas into a form others can see, understand and work from.
It enables the filmmaker to work out what they can film and when might be a good time to film it during the schedule. As an example, if action is happening on one side of a room (A), then action on the other side of the room (B), followed by more action on side (A). If these were filmed in order, you (the filmmaker) would not only have to move the camera back and forth, but also the lights and probably props.
The example storyboard here doubles as a ‘shooting script’ which helps plan the order of filming.
Working out all the shots you need in set up (A) and set up (B) means you can schedule to film all your (A) shots first, then all your (B) shots, thus saving a great deal of time, because you are not having to move backwards and forwards constantly.
This is one of many reasons why films are shot out of sequence, to make the production flow economically and as practicable as possible.
Storyboards can often resemble a graphic novel, conveying information about the action within the shot and cameras movements in relation to the action.
THE SHOTS (ABBREVIATIONS)
These are simply shorthand to simplify what is written, as POV would mean Point Of View, referring to a shot where the camera sees what a character is viewing for instance, as if from their eyes.
Other abbreviations include;
BG = Background
FG = Foreground
OTS = Over The Shoulder
Shot type abbreviations and examples:
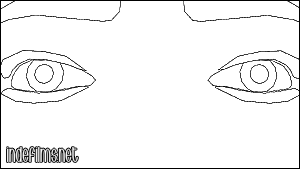 |
ECU = Extreme Close Up
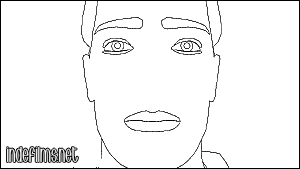 |
VCU = Very Close Up
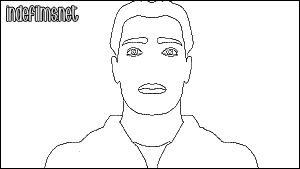 |
CU = Close Up (sometimes considered the “Head and Shoulders shot”)
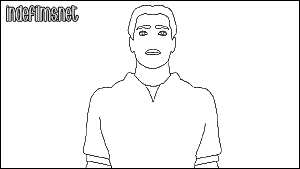 |
MS = Medium Shot (medium close)
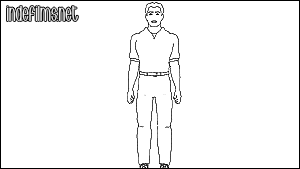 |
WS = Wide Shot
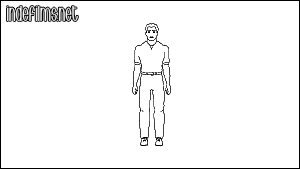 |
LS = Long Shot
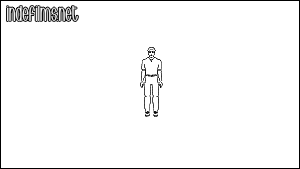 |
ELS (or VLS) = Extreme Long Shot, or Very Long Shot
BUT I CAN’T DRAW
Doesn’t matter. In this case just keep it simple. If you can understand it enough to remind yourself what you want, then that’s useful enough. As you will see, a lot of the language of stroyboarding does not require you to create masterpieces. When you get a budget you can employ a storyboard artist to realise the visuals.
KEEP IT SIMPLE
Following are two pages from a storyboard. These are fundamentally quick sketches, but could be even simpler than this.
(1)  (2) (2) 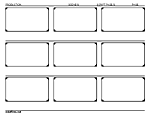
(1) 4:3 (1.33:1) jpeg image (39 KB) and (2) 16:9 (1.78:1) jpeg image (27 KB) Storyboard formats for download.
(3) 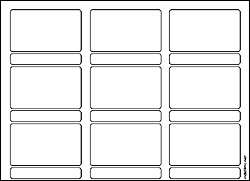
(3) 16:9 (1.78:1) Simplified storyboard PDF format (698 KB)
(4) 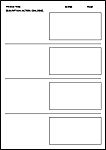
(4) 16:9 (1.78:1) storyboard PDF, JPG formats
(zip file size 144 KB, unzip size 284 KB)
Further form templates are included with some of the DVD’s in the Books/DVD’s section. Click link to find out which books/dvd’s include these. |
CHARACTER AND PROP MOVEMENTS WITHIN THE FRAME
Character action and movements of props (i.e opening doors) can be indicated by arrows as well, but close to drawn characters so as not to confuse. These can be line arrows (as depicted in the stroryboard examples here).
A storyboard format (shown below) can even help to work out conceptual ideas and sequences for visual fx.

DESCRIBING CAMERA MOVEMENT VISUALLY
Other visual shorthand is used in storyboards to describe the movement of characters within the frame and the camera movements, angle and/or focal length. Most of these graphic descriptions use simple arrows, or frames within frames to make their point. You can of course just write what you want to see in terms of movement.
You don’t have to constrict yourself with keeping / drawing within the frame. You can draw outside the frame, stretch and tilt the frame and join two or more frames if it helps to describe the shot movement, angle etc.
In some circumstances for ease, or because the set up is complex, it may be helpful to sketch out a floor plan, outlining camera and action details.
Zooming can be visually indicated in the following ways;
Diagram 1: Zoom In
Diagram 2: Zoom Out
Above; Simple “scribbled storyboard” with written (scribbled) details for cgi animation. Below; The final result.
Following the visual example you can also describe the start and end shots i.e. for the zoom in diagram 1 MS to CU (Medium Shot to Close Up) and zoom out diagram 2 CU to MS (Close Up to Medium Shot).
To indicate a dolly you can draw an arrow in the direction that it is going (left to right, or right to left), that can also depict a pan, so write down the intention. The following gives a visual indication of dollying forwards and backwards, also whether high, low angle. All the follow examples could be described by simple line drawings.
Dolly out low angle
Dolly out high angle
Dolly in low angle
Dolly in high angle
Other camera movements / dollying (or hand-held movement) can be indicated by the following examples, or straight lines left / right with arrows.
 
Movement around to sides from a low angle
 
Movement around to side from a high angle
All the diagrams / arrows above are available in this zipped file (jpeg images) for print and use in your own storyboard (zip file size 57 KB, unzip size 172 KB).
You can however write next to the storyboard frame what other movements may occur in the shot as an alternative. |